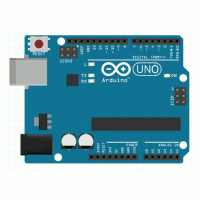
Debugging classic AVRs in the Arduino IDE 2 is finally possible! It took a while to implement this feature, but now it is just a piece of cake to enable debugging and start using the debugger.
Continue readingResurrecting Bricked AVRs
The featured picture of this post has been generated by Dall-E.
Three years ago, I wrote a short blog post about AVR fuses and what to do when you brick your MCU by setting the wrong fuse. This included a lot of jumper wires. In order to get rid of the jumper wires, I decided recently to design an Arduino shield that supports resurrecting bricked MCUs, which you can now buy at Tindie.
Continue reading
An IoT Badge Rack
If you own several badges, cards, or tickets and would like to automatically publish the number of unused badges on the web in real-time, there is no off-the-shelf solution. This post describes how to build such an IoT system.
Continue readingConnecting the AVR-IoT Cellular Mini Board to the Internet
The featured image of this blog post is based on a picture by Gerd Altmann from Pixabay.
When you want to connect a sensor or actuator to the Internet and there is no WLAN around, then the next best option is LPWAN (Low-Power Wide Area Network). In this blog post, I will describe how to connect a sensor to a website using the AVR-IoT Cellular Mini board by Microchip.
Continue readingSoftware I2C Multiplexer
The featured image of this post is by Thomas from Pixabay.
What can you do to connect many I2C devices with the same device address to an MCU? Most often, the advice is to use hardware solutions. Here, we will look at how to solve the problem with software employing the FlexWire library.
Continue readingReplacing the Wire Library—Sometimes
The featured picture of this blog post is by user18526052 on Freepik.
The Wire library is the one that connects your Arduino to sensors and actuators that communicate using the I2C protocol. Unfortunately, this library has a lot of shortcomings, and often you want to replace it with a different I2C library. Replacing the Wire library on a per-sketch basis turns out to be more complicated than one would expect. In this blog post, I describe an easy way to accomplish that.
Continue readingThe New ATtinys
Microchip launched a new generation of ATtinys. Is it worthwhile to consider them for your next DIY project?
Continue readingSpontaneous MCU Restarts: Why Do They Happen?
The featured picture of this blog post is by rawpixel.com on Freepik.
AVR MCUs sometimes appear to restart without you having pressed the RESET button or any other obvious reason. Is that a sign of resilience or of looming danger? How can you find the root cause?
Continue readingDebugging 2.0
The featured image of this blog post is based on vector graphics by captainvector at 123RF.
What keeps people from using a debugger? Well, it is mostly that one has initial costs in terms of setting up the debugging environment and of learning how to use the debugging tool. Hopefully, the next iteration of my hardware debugging tool dw-link, which is able to debug classic ATtinys and ATmegaX8s, will somewhat ease that burden, in particular, because you can buy the accompanying hardware now at Tindie.
Calibrating Your AVR MCU
The featured picture is by OpenClipart-Vectors on Pixabay.
In building one’s own MCU board, one often does not use a crystal or resonator. Instead, the internal RC-oscillator is employed, which can be quite inaccurate. Similarly, if one wants to use the internal reference voltage to measure the supply voltage, it turns out that the reference voltage can deviate from its nominal value quite a lot. Both, the RC-oscillator and the internal reference voltage can be calibrated, though. In this blog post, I describe a simple method to calibrate both using only a UNO board and a multimeter employing the avrCalibrate library.
Continue reading