The featured image of this blog post has been generated by Stable Diffusion.
What happens if you take a dozen clocks and throw them into the flow of time?
The flow of time
When you throw a dozen clocks into the flow of time, they will probably happily tick away and slowly drift apart from each other. This can have fundamentally different reasons, tough. If you are dealing with atomic clocks, bringing some of them up to high mountains and then down again can lead to measurable differences caused by relativistic effects. If you are dealing with ordinary real-time clocks (RTCs), they go different ways even without being affected or knowing about Einstein’s relativity theory.
As I mentioned in one of my last blog posts, RTCs have an inherent inaccuracy that varies between 1 ppm and 20+ ppm (and can be worse). This is at least what the data sheets say. Of course, it is interesting to see, how that plays out in practice.
Other people have tried that before, of course. And, I guess, manufacturers do that as well. Pete Stephenson conducted a 5-month experiment comparing different DS3231 exemplars. Dan Drown did a number of short-time experiments over a week or so and collected highly accurate data. Finally, I found this online article by Francisco Tirado-Andrés, which compares different kinds of clocks theoretically and empirically.
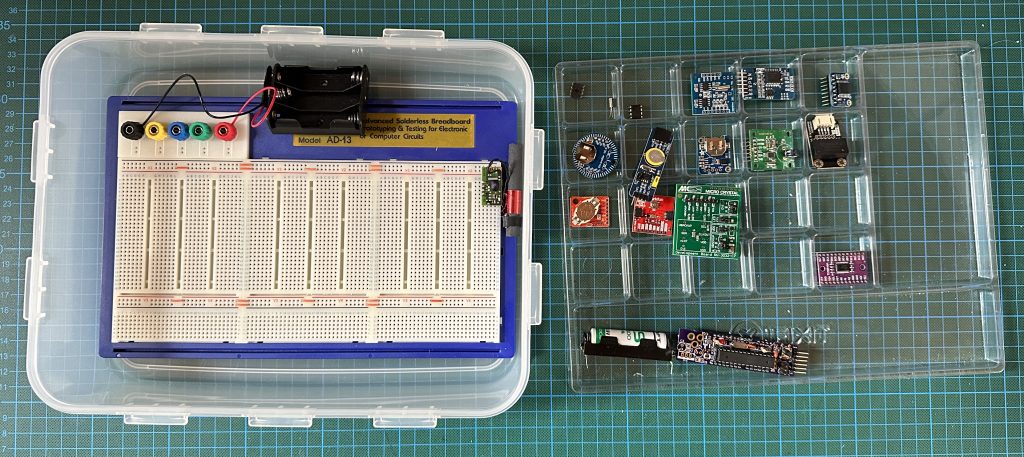
My plan is to send roughly a dozen different RTCs on the journey, exposing them to harsh environments (as harsh as it gets here), and leave them basically alone for 12 months (well, checking regularly what they are doing).
Preparing for the journey
The idea sounds conceptually simple, but a few preparations are necessary.

The RTCs should run for quite some time unattended, meaning the entire system should not be too power-hungry. Then we need a bit of software to calibrate the clocks at the outset, and we need a means to measure their deviation from the true time. The latter will be done using DCF77, using the DCF77 library by Thijs Elenbaas. There exists another DCF77 library, which is supposedly more accurate and robust. However, it also takes up more flash memory. Maybe, I come back to it later.
And then there are a dozen different RTCs requiring a dozen different libraries to get and set the time and calibrate the clocks in the beginning. So, what one would like to have is something like a unified library for talking with all the chips using a standard interface.
The library that comes to mind is RTClib by Adafruit, originally by Jeelabs. This library covers 4 different popular RTCs, but they still have four different classes/interfaces. The common base class contains only the basic functions to read and write individual registers. The derived classes have sometimes similarly named methods, but not necessarily so. And even if so, you could not use them in a context when you know the type of RTC only at runtime.
So nothing that I had in mind existed. In other words, we need a new library.
A unified RTC library: RTC_I2C
How could one implement such a library, and what should it cover? When you go through the different data sheets, you notice that the RTCs have a vast amount of different ways to cater for the needs of a user. However, there are a few functions almost all RTCs offer.
- Set the current time in the RTC (and perhaps start the clock).
- Get the current time from the RTC.
- Check, whether timekeeping on the RTC is valid.
- Set an alarm time. The common denominator seems to be that an alarm can be specified by hour and minute. Most of the RTCs also support an hourly alarm at a specific minute.
- Enable or disable the alarm. When enabled, one of the output pins serves as an interrupt line.
- Sense whether an alarm has occurred.
- Clear the alarm flag.
- Enable or disable the output of the clock signal, usually the 32.768 kHz frequency.
- Enable or disable the output of a 1 Hz signal.
- Set an adjustment register that can mitigate the clock drift. Some of them do that in steps of 0.1 ppm, others have a 4.5 ppm step size.
- Then, finally, each RTC supports the setting and reading of single registers.
Well, one RTC does not have an alarm. Others have only very special kinds of alarms. A few more do not offer adjustment registers. Apart from that, however, this interface looks universal.
C++ also offers the tools to provide a unified interface by using inheritance of methods. A base class, called RTC, declares all methods as virtual methods and implements a few that are sort of universal, namely, setting and getting the time. Then for each type of RTC, another class needs to be defined that inherits the base class and implements the remaining methods.
Based on that, one can define an array of pointers to RTCs, where each slot can hold a pointer to a different instance. When iterating over the array, it is then possible to treat each element in the same way. The following sketch illustrates that.
#include <RTC_I2C.h>
#include <RTC_DS1307.h>
#include <RTC_RV8803.h>

DS1307 rtc0;
RV8803 rtc1;
RTC *rtc[2] = { &rtc0, &rtc1 };

void setup(void) {
  Serial.begin(115200);
  for (byte i=0; i < 2; i++) rtc[i]->begin();
}

void loop(void) {
  time_t t;
  for (byte i=0; i < 2; i++) {
    Serial.print(F("RTC")); Serial.print(i); Serial.print(F(": "));
    Serial.println(rtc[i]->getTime());
  }
  delay(1000);
}
This is actually the first time that I have used inheritance in C++. And it worked quite well so far. It seems to be the case that a little bit more flash memory is used, probably because of dynamic binding. I will have a closer look at that when I am done with implementing the library.
If you are interested in this library, which covers now 12 different types of RTCs, you can download it from GitHub.
Avoiding I2C address clashes
In the example sketch above, we have two different RTCs that are using the same I2C bus. In this example, things work out, because the RTCs have different I2C addresses. However, in general, one may run into problems. For instance, 5 different types of RTCs use 0x68 as their I2C address. And there is no provision to change the I2C address for these RTCs.
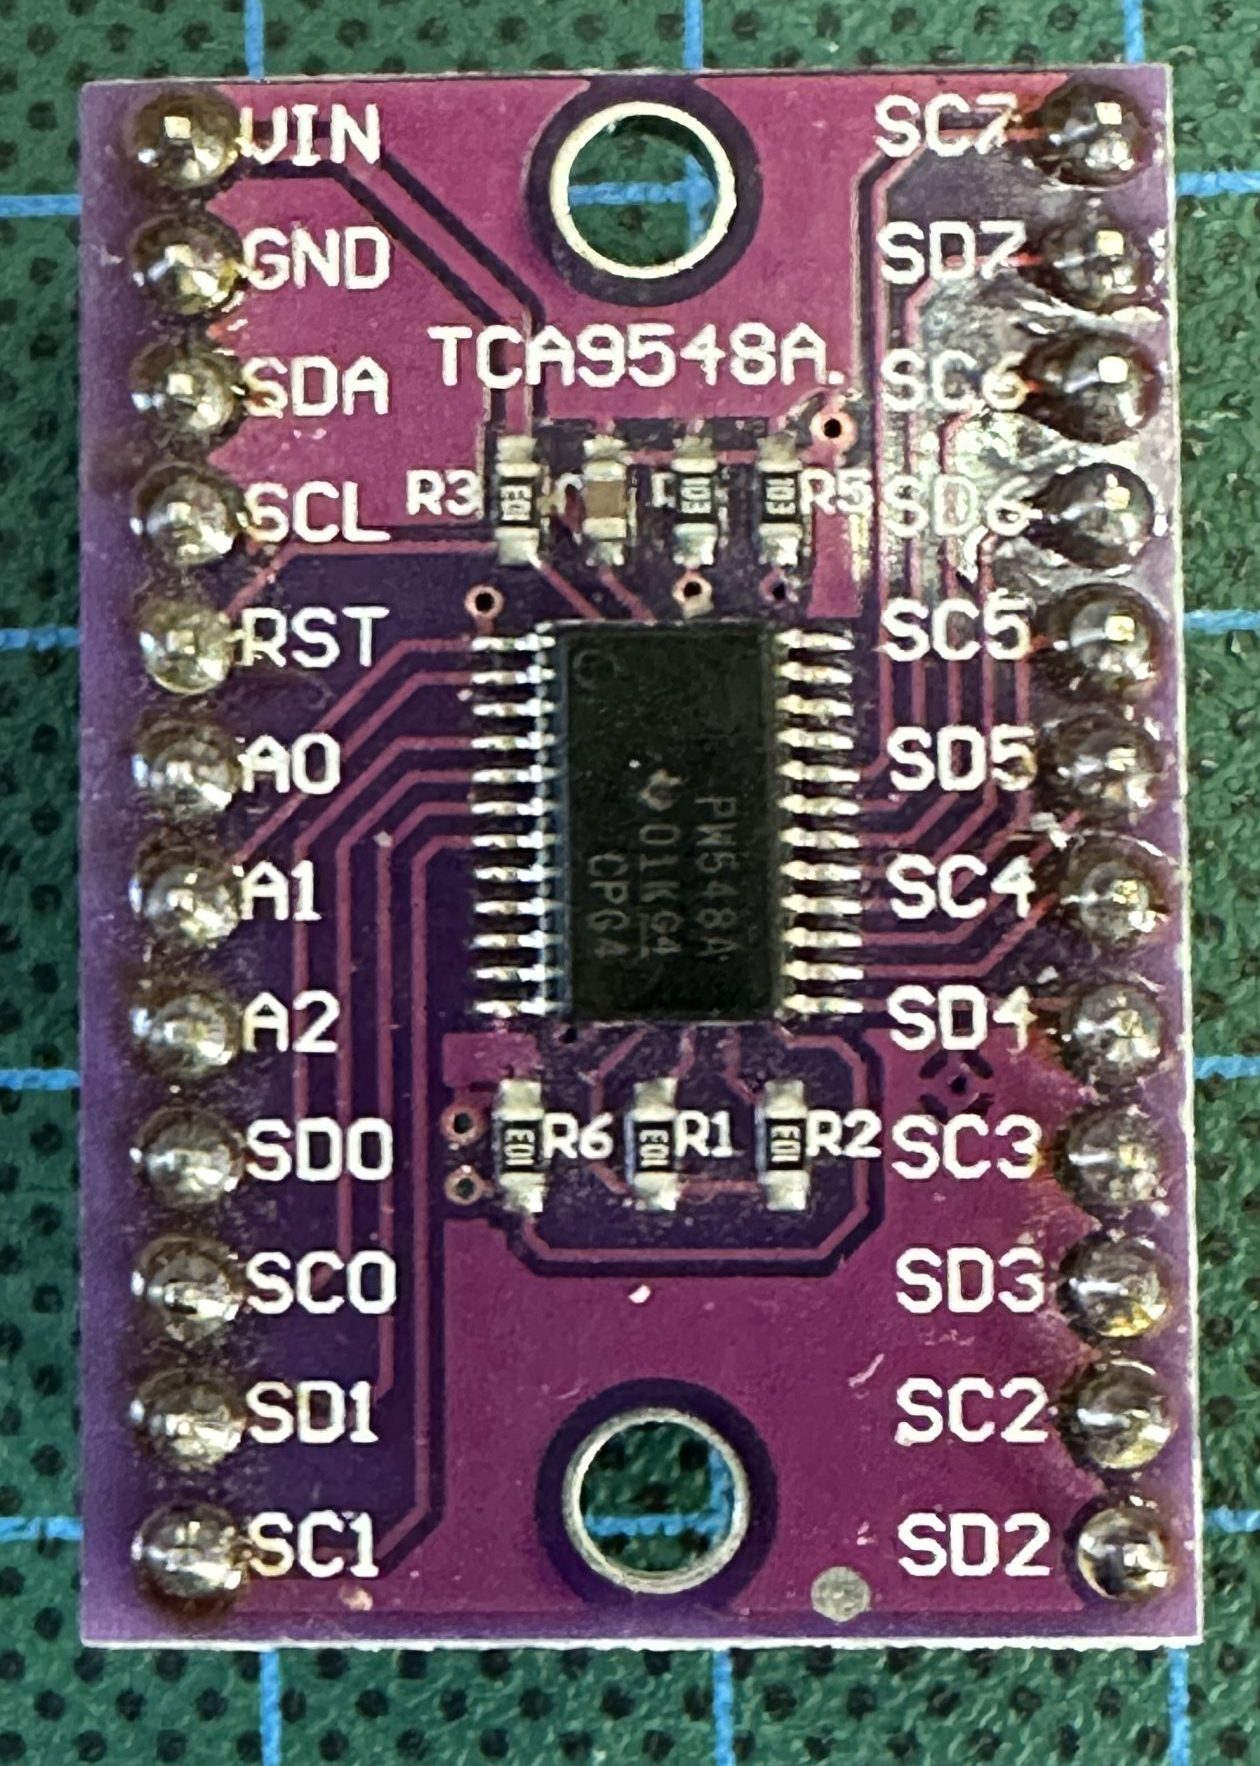
 Of course, this is a general problem when you use more than one I2C device in your project. And therefore, there are also general solutions for it. The so-called I2C multiplexer TCA9548 allows for having 8 different ‘local’ I2C buses. It works as follows. The multiplexer has an I2C address as well, which can be configured to be between 0x70 and 0x77. This address must be unique among the devices you want to access on the I2C bus. The only command this multiplexer accepts is a byte in which each bit specifies which local I2C buses should be connected to the global I2C bus. For example, after sending the byte 0x84 to the multiplexer, the local buses #7 and #2 are connected to the global bus, because the bits number 7 and 2 are set. After sending 0x00, all local buses are disabled. The multiplexer can at the same time be used as a level converter because each local bus has its own pull-up resistors (and supply voltage).
Instead of using an I2C multiplexer, the MCU could drive different I2C buses. Some Arduino MCUs, e.g., ESP32 and the Due have two I2C ports and the second one can be accessed by using the instance variable Wire1. The instance variable that one wants to use for a particular RTC has to be specified when calling the begin method of the respective RTC instance.
In principle, it should also be possible to use different software I2C instances to create different I2C ports. The library SoftWire could be used for this purpose, for instance. Because the Arduino IDE lacks a bit of flexibility concerning the specification of which libraries to consider, one probably has to jump through some strange hoops in order to make it work. I will have a look at that in a later blog post. Since I own two of the above-mentioned I2C multiplexers, I did not have to try this out, though.
Initial test & calibration
After having implemented the library, I needed to test it out on all the different RTCs. And I made quite a number of surprising discoveries (and here we abstract away from the errors I introduced on my own behalf).

First, the Waveshare PCF8563 breakout board did not work at all. Reading the time registers returned different values all the time. Looking at the signals with an oscilloscope confirmed that everything was alright on the bus, so it must actually be the chip. So, I bought a different breakout board (DIY MORE seems to build them, for example), which was better designed in many respects, and, more importantly, it worked. I had a similar problem with the RV-3028 breakout board from Mikroelektronika, which sometimes worked, but then the I2C lines were stuck to zero. After a while it worked again, no idea why. A different breakout board from Pimoroni works flawlessly. Perhaps both of the problematic RTCs mentioned had been victims of ESD.
Concerning the software interfaces, I have two winners in the category “ugliest interface.” The RS5C372 excels by using an addressing scheme for the internal registers I have never seen before. The register addresses have to be shifted 4 bits to the left! To make matters even more complicated, the I2C interface requires a repeated start condition between an I2C write sequence that sets the register address and the following I2C read sequence. The MCP79410 surprises the programmer differently. Many important control bits are stored in the time register (to save money?) and their default value is one. This makes the code for setting the time considerably different from what is used for other clocks. And then it supports only 6 different alarm modes, but none of them is a simple match for minute and hour, which all the other RTCs offer. Most annoyingly, both RTCs do not offer any means to reset the divider chain, which means that it is impossible to synchronize the start of the clock with the other clocks. Or, stating it differently, using these RTCs, you have an initial uncertainty of one second!
After the library worked with all the different RTCs, I calibrated them. That means that I measured in how far their nominal 1 Hz signal deviates from 1 Hz using my frequency analyzer FA-2, which is supposed to be extremely accurate. In response, I computed the offset value and stored it in the calibration registers (see table below). I would expect that this will help in keeping the RTCs reasonably accurate at room temperature. The plan is, however, to put the RTCs in an outdoor environment and see how the clocks fare. The expectation is, of course, that the RTCs with TCXOs will fare much better than the ones without.
| Name | Ext. X | Initial (ppm) | Calibrated (ppm) |
|---|---|---|---|
| DS1307 (Elecrow) | Y | +65.7 | |
| DS1307 (Adafruit) | Y | +18.2 | |
| DS1337 | Y | -43.7 | |
| DS3231SN | N | +0.2 | 0.0 |
| DS3231M | N | -4.0 | -0.2 |
| MCP79410 | Y | -28.0 | -0.3 |
| PCF8523 | Y | +106.9 | +1.5 |
| PCF8563 | Y | +13.5 | |
| RS5C372 | Y | +12.6 | +1.5 |
| RV-3028 | N | -2.0 | +1.5 |
| RV-3032 | N | 0.0 | 0.0 |
| RV-8523 | N | +2.8 | -2.3 |
| RV-8803 | N | +1.5 | -0.3 |
| SD2405 | N | +2.3 | +2.3 |
Interestingly, some RTC boards with external crystals show a much higher deviation than what one would expect when the data sheets state that crystals have a ±20 ppm accuracy. For example, the Elecrow DS1307 breakout board has a deviation of 65.7 ppm. The Adafruit DS1307 breakout board, however, only has a deviation of 18.1 ppm. The Adafruit board is, however, almost ten times more expensive than the Elecrow board.
On the other hand, I was impressed that in all cases where an offset register is provided, one could get an accuracy better than ±3 ppm (short-term at room temperature). In any case, the DS3231SN, RV-3032, and RV-8803 are the clear favorites when it comes to accuracy. Since they also sport a TCXO, I expect they will be the “winners” in the end.
Experimental setup
The only thing left is to set up the experiment. This means to write a sketch that sets the time for all the RTCs. The sketch tries to do that in a way such that the error is less than 10 ms. As I noticed above, this is unfortunately impossible, so I recorded the initial time difference.
The main purpose of the sketch is to measure the daily drift. Since temperature is a main factor for the change in clock frequency, temperature is measured every hour using the DS18S20 sensor. In addition, every 24 hours, the drift of all RTCs against DCF77 time is measured and stored in an external EEPROM.
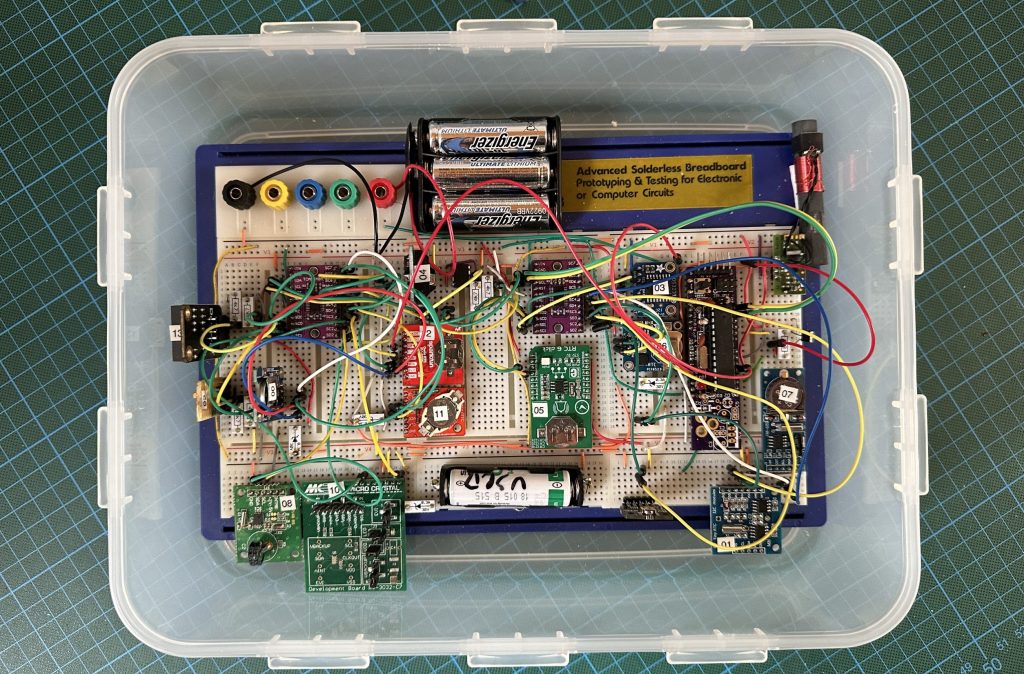
The hardware setup is shown in the picture below. The wiring looks a bit chaotic but is very regular. All RTCs are connected to the MCU via the I2C multiplexers (the violet breakout boards). The MCU provides a switchable supply voltage to the multiplexers and three sets of RTCs with separate GPIO lines. The four RTCs to the left also have an additional backup battery. This is needed, because the breakouts either do not have a backup source at all, or as in the case of the RS5C372 and the SD2504, they only have a super cap or a rechargeable battery of unknown capacity, respectively. In the upper right corner, you see the DCF77 receiver, which is an EM2S module by HKW Elektronik.

Left to the DCF77 module, the Arduino board can be seen. In this case a Boarduino by Adafruit, which they do not produce any longer. I had taken their Eagle data and ordered 3 boards from OSH Park. The advantage of these boards is that you can build them in a way such that there is no electronic overhead, which is important for low-power projects such as this one.
After having tested the sketch, I initialized everything, and now we will wait for the results.
To be continued in a few months …


Leave a Reply